Cranberry Buttermilk Biscuits

Why, hello again! I hope you are all having a wonderful Thanksgiving, filled with lots of delicious food, family, and friends. This is the first year that I’m not going home for Thanksgiving, because with the silly quarter system schedule with Northwestern, I would have only had to come back here for one week between winter break and Thanksgiving, and figured I would save the money on airfare and try to get a bit of work done in my apartment.

It’s been quite awhile since I last posted, as you probably realized. Life has been a bit crazy the past months, with me starting my junior (?!?!) year at Northwestern, taking lots and lots of classes, and going to a plethora of music festivals over the summer. I was traveling a lot, going from Ottawa to Bowdoin to northern Quebec, and it was so, so wonderful. I had the opportunity to work with wonderful teachers from the US and Canada, and the musicians I met were all so inspirational, and I really grew as both a musician and a person.

I have to admit, I’m slightly embarrassed by how little I cook now that I have my own place at school. When I get home, I’m usually famished and am looking for something that I can eat without having to cook for more than 5 minutes. I’ve been eating lots of the marinated tofu and pre-cooked frozen brown rice from Trader Joe’s, although there have been a few nights where I ~splurge~ and make some fish. In addition, I don’t have the luxury of my mom‘s pantry, so my cooking and baking time has been limited. Thankfully, I’ve had some time to leisurely make some treats using one of my all time favorite ingredients- fresh cranberries. These biscuits are light and flaky, and an easy start to a day that is filled with lots of food.

Cranberry Buttermilk Biscuits: Makes 6 biscuits

Adapted from How Sweet Eats

Ingredients

  • 1 1/2 cups all purpose flour
  • 2 tablespoons brown sugar
  • 2 teaspoons baking powder
  • Pinch of salt
  • 1/2 teaspoon baking soda
  • 3/4 stick cold unsalted butter, cut into cubes
  • 5/8 cup buttermilk
  • 1/3-1/2 cup fresh cranberries

Directions

  1. Preheat the oven to 425 degrees.
  2. In a large bowl, combine the flour, brown sugar, baking powder and soda, and the salt. Using your hands (or fork or pastry blender), add the cold butter and mix until it looks like coarse crumbles. Add the buttermilk and stir until just mixed. Fold in the cranberries.
  3. Scoop six even spoonfuls onto a baking sheet, about 1/4 cup each. Bake for 12-15 minutes, or until golden brown.

img_2581

Obviously, these aren’t the only things I’ve eaten today…. (shh).

-Rayna 🙂

Chestnut Thumbprints with Fig and Ginger Jelly

Good morning everyone! I hope you all had a wonderful Christmas and splendid plans for the New Year, ranging from ordering Chinese food and cuddling up on the couch, or indulging in ~adult~ beverages with friends, or a combination of the two. I fly back to school very early on Saturday morning, and classes begin on Monday morning. I can’t say I’m ready to go back to school quite yet, as I’ve been enjoying my leisurely lifestyle of baking, sleeping, and watching TV as my only responsibilities.

One thing that I love about being at home is the variety of ingredients that are available to me. These range from ingredients that have no labels in english to specialty flours, such as the chestnut flour that I found in our cabinet. It can be difficult to find recipes that use these ingredients, but I’ve found that if a recipe already calls for a specialty or unusual type of flour, I can replace it with a similar item- like in these cookies. The original recipe called for buckwheat flour, but I loved the slightly sweeter edge the chestnut flour added, especially since the jelly I used to fill them was not as sweet.

These have to be up there as one of my favorite holiday cookie recipes. Around this time of year when there are thousands of different recipes circulating around the internet, I found these to be a welcome change. The dough almost acts as a shortbread- it is crumbly and buttery, but stays together well enough to act as a cookie. I like to emphasize the thumbprint by taking the cookies out when they are about halfway done and press them again (with a teaspoon or another similar item). Happy holidays everyone!

DSC_3098.jpg

Chestnut Thumbprints with Fig and Ginger Jelly

Makes about 45 Cookies | Adapted from Technicolor Kitchen

Ingredients

  • 1 1/2 cups (210 grams) all-purpose flour
  • 1/2 cup (45 grams) chestnut flour
  • 1/8 teaspoon salt
  • 200g unsalted butter, softened
  • 1/2 cup (100 grams) granulated sugar
  • 2 large egg yolks
  • 1 teaspoon vanilla extract
  • Fig and ginger jelly, or any other preserve

Directions

  1. Preheat the oven to 350 degrees. Like two cookie sheets with parchment paper.
  2. Mix together the flours and salt in a large bowl. In an electric mixer fitted with a paddle attachment, cream the butter and the sugar. Add the egg yolks and the vanilla extract until just combined. Stir in the dry ingredients in two additions. Do not overmix!
  3. Using a small ice cream scoop or tablespoon, scoop the dough onto the lined cookie sheets. Using a teaspoon (or tablespoon), make a deep indentation into the cookie.
  4. Place in the oven for 10 minutes, then remove and repress the indentations. Fill with the preserves, then bake for 5-7 minutes longer, until the cookies are brown around the edges. Cool for a few minutes, then transfer to a wire cooling rack.

See you in 2016!

-Rayna 🙂


Cranberry Pear Pie

Good afternoon everybody! I hope the holiday season has been going well for all you guys. I’ve been home for almost a week at this point, thanks to Northwestern’s wonky schedule. I can’t believe that I’m already done with my first quarter of sophomore year, but I head back to school the day after New Year’s, so I’m trying to make the most out of the time that I’m back: relaxing, baking, practicing, and going into New York City a whole bunch. Chicago is great and all, but I really do miss the northeast while I’m at school. I already have my heart set on living/going to school in NYC after Northwestern, but I still have many years before that.

I have an overwhelming love for cranberries, specifically raw cranberries. I’ll eat them by the handful, and it amuses my mom to no end. She will specifically buy them for me in anticipation for my return, and in this case, it was Thanksgiving. Although I made this beautiful pie for dessert for my Thanksgiving meal, it would be a wonderful addition to any dessert potluck or get-together this holiday season. Between the thousands of cookies that are bound to be offered, this stunner is sure to stand out.

I’ll admit- I did cheat a bit and use frozen pie crust. Partly because I don’t really eat the pie crust anyway, and partly because I planned out my dessert baking poorly and didn’t have the hours for homemade pie crust to chill in the fridge. I loved the addition of pears- the extreme sweetness counteracted the especially tart raw cranberries, and it made a pretty darn good breakfast the day after too 🙂

DSC_2508.jpg

Cranberry Pear Pie

From Williams Sonoma

Ingredients

  • 1 package Immaculate Baking pie crusts
  • 2.5 pounds pears, peeled, cored, and sliced
  • 1/2 cup light brown sugar
  • 1/4 cup granulated sugar
  • 1/2 teaspoon ground cinnamon
  • 1/4 teaspoon ground nutmeg
  • Juice of one lemon
  • 1/4 cup cornstarch
  • 1.5 cups fresh or frozen cranberries
  • 1 egg beaten with 1 teaspoon water
  • Turbinado Sugar

Directions

  1. Fit one pie crust into a 9-inch baking dish and refrigerate until ready to use.
  2. Take the other pie crust and cut into strips, of either equal or varying widths. Place on parchment paper on a cookie sheet and refrigerate until ready to use.
  3. Preheat the oven to 400 degrees F.
  4. For the filling, in a medium pot, combine the pears, brown sugar, granulated sugar, cinnamon, nutmeg, lemon juice, and cornstarch. Cover and cook until the pears are tender, but not mushy, approximately 15-20 minutes. Let cool to room temperature.
  5. Stir in the cranberries to the pear mixture and pour into the prepared baking dish.
  6. Take the strips of crust to create a lattice.
  7. Brush the lattice crust with the egg wash and sprinkle with turbinado sugar.
  8. Bake until the crust is golden brown and the filling begins to bubble, about 45 minutes- 1 hour, but begin checking the oven after 30 minutes.

It’s certainly nice to have an oven again!

-Rayna

Peanut Butter Mug Cake

Good afternoon guys! I hope your weekends have been as fun as mine has been so far. I have lots of studying to do, but I think I’m doing an okay job with balancing it all out. This week is midterm week for me, so I have exams in virtually all of my classes. After my first orchestra concert of the year on Saturday night, things will get much easier for me, until finals, that is!

I’ll be the first one to admit that I was a little bit wary of microwave cakes that take less than 7 minutes to make. Especially since at home I was fortunate enough to have access to high end kitchen equipment, I never bothered trying any of the mug cakes or other assorted microwaveable recipes. Clearly, that all changed once I got to college, where the most amount of cooking I could do was make ramen in my room, using the hot water from my coffee maker. Honestly, I can’t say I’m completely converted to the world of mug cakes, but for a lazy college student with no access to a kitchen, it’s great way to treat yourself.

I figured I would start out with a pretty simple flavor- peanut butter. The ingredients are similar to those of a normal cake, just scaled down greatly. I don’t have measuring cups in my room, so I did just eyeball most of the ingredients (I would probably use measuring cups if I had them, however). Now that I’ve broken my mug cake virginity, I can’t wait to try some other flavors and even branch out into savory microwaveable treats!

(Also- if anyone has photography tips for a poorly lit dorm room, please send them my way!)

Peanut Butter Mug Cake

Peanut Butter Mug Cake

Recipe from Kirbie’s Cravings

Ingredients

  • 4 tablespoons all purpose flour
  • 4 tablespoons granulated sugar
  • 1/4 teaspoon baking powder
  • 1 egg
  • 3 tablespoons peanut butter
  • 3 tablespoons milk
  • 3 tablespoons vegetable oil

Directions

  1. In a large mug, combine all ingredients and mix until smooth. Microwave for 1:30 and check for doneness, then cook in :30 intervals until done (mine took around 2:15) Don’t overcook!

Who said dorm food had to be boring?

-Rayna 🙂

Strawberry Banana Overnight Oats

This year has already gotten off to a great start. I’m much busier than I was last year, but since I’m no longer a freshman, I have a year under my belt and have a general idea of what to expect for this year. Probably the biggest differences are in the living situations. I’m living in a single in a suite on campus, and some of my friends have an apartment about 15 minutes away. I don’t see them quite as frequently as when they lived literally in the dorm next to mine, but that’s also because we just all have more homework. So far, it’s been a great balance, and I’m hoping that will continue even in the chilly winter bound to come sooner rather than later.

I’m not the only person who likes to cook but lives in a dorm, so there’s a lot of recipes out there that I can make in my cozy dorm room. I have a mini fridge/freezer in my room, but the lounge has a microwave and a toaster. My friends in the apartment do have an oven, so I’ll try to make some stuff over there, but for the most part these are going to be my quickie recipes that I make for myself in my cozy single.

Breakfast is hands down my favorite meal of the day, and always has been. Aside from the food being undeniably the best out of any meal, I’ve realized that by sitting down and eating ~real food~ (not energy bars) for just gets my day started on the right foot. Overnight oats are not a new thing in the blogosphere, so I think I’m a little late jumping on the bandwagon. I don’t really measure what I put in (I just eyeball it based upon how hungry I think I’m going to be), but I’ll give you guys estimates. I made this batch with banana kefir, which was really delicious. It’s creamier than almond milk, but gives you the tang of the yogurt without getting too thick. Topped with fresh strawberries (which are quite a delicacy here), it’s the perfect way to start the week on the right track!

Strawberry Banana Overnight Oats

Overnight Oats

Ingredients

  • 1/2 cup rolled oats
  • 1/2 cup banana kefir
  • 1-2 tablespoons chia seeds
  • 2 teaspoons agave nectar
  • 1 teaspoon cinnamon
  • Fresh strawberries

Directions

  1. In a jar or mug, mix together the oats, kefir, chia seeds, agave, and cinnamon until well combined. Let sit in the refrigerator for at least 4 hours. Top with fresh berries.

They’re oat-a this world! (If you can think of better oatmeal puns, please let me know!)

-Rayna 🙂

A Long Overdue Update

Well hellllllo there again! This has been a ridiculously long hiatus and I think it’s about time that I get into the swing of things again. Clearly, a plethora of things have occurred in the past year or so, so I’ll try to give you guys a quick rundown of what I’ve been up to. So to start things off, I am going to be an incoming sophomore (?!?!?) at Northwestern this year, which seems pretty crazy to me. I feel like it was just yesterday I was blogging about MSM Saturdays and gymnastics meets. I’m currently a duel-degree student majoring in anthropology and viola performance, which is pretty neat. It’s a five-year deal, so I can really squeeze out everything Northwestern has for me. I’m flying out tomorrow, and classes start again on Monday. Bring it on!!

204C820F-C1A1-4042-B4FA-39F8133666EC

That’s me and my stand partner/friend/roomie/violist Hannah last winter in front of Northwestern’s beautiful new music building that I’ll be practicing in this year. I get the best of both worlds because while we are sharing a suite, we each get our own rooms.

402D35AA-6A1D-48E7-8544-D9FF4F4AE6F8

One of the highlights of this past year at school was being able to travel to Tighza, Morocco, with Hillel at Northwestern. We went during my spring break, and it was a really great experience. It was technically a service trip, but between the travel time getting there (about 11 hours each way), the 6 hour time difference, and the bizarre weather, (notice the snow?? They told us it was going to be in the mid 60s) we didn’t do a lot of community service. However, I met some wonderful people on the trip, and it was certainly unforgettable.

SubstandardFullSizeRender

Now onto the fun stuff- how I’ve been spending my summers. Last summer, I went to Ottawa for the NAC-SMI program and the Castleman Quartet Program in Fredonia, New York. It was my second time in Ottawa, and it was just as fun as the first year. QP was quite a different experience, but the emphasis on chamber music was really wonderful, as it’s my favorite type of music to play. This summer, I was fortunate enough to spend 8 weeks in stunning Aspen, Colorado, for the Aspen Music Festival and School. The picture here is the pathway to the dorms, so clearly, I was not spoiled at all. I had truly an incredible time, meeting people from all over the country that are so so so talented. I was in the orchestra program there, and got to play some fantastic repertoire. I’ve been home for about 2 weeks since Aspen, but I still dream of the pure air and impeccable (not humid) weather.

SubstandardFullSizeRender-1

That’s about it!! Here’s me and my mom at a Yankee game last week, enjoying every last moment of sunshine before I return to face my second Chicago winter. My plan for this coming year is to (obviously) be more active, but have this be a how-a-college-foodie-manages-in-dining-halls type of thing, showing you guys quick recipes I can make in my cozy dorm room and updating you on sophomore year shenanigans, which there are bound to be tons of.

Also- I don’t want you guys to think I’m not baking. I made this ~amazing~ recipe for Rosh Hashanah yesterday, and daydream about kneading dough. That’s normal…right?

Write soon!

-Rayna

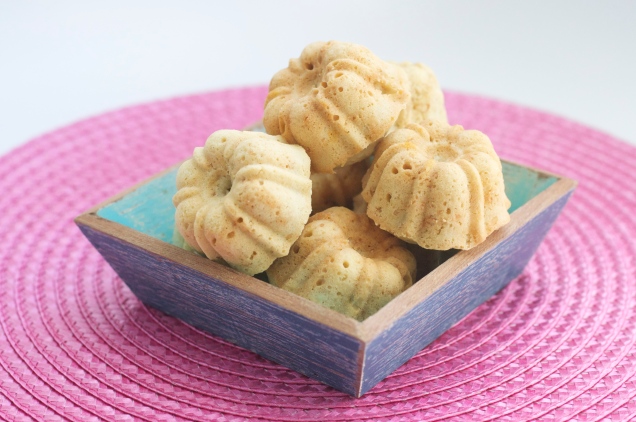
Mini Toasted Coconut Bundt Cakes

I couldn’t love spring more if I tried. I was the lucky one out of my siblings and I don’t have to worry about wheezing at the sight of the beautiful cherry trees in our front yard or getting itchy red eyes if the windows in my car are left open.  Typically, spring can also be a stressful time of year for me, but I didn’t have to take my end of year jury at MSM and I only have a few days left of school before I start my senior internship. It’s crazy how time flew by after all of my college acceptances!

DSC_2501I know I’ve mentioned it here before, but my mom runs a pretty cool website called The Weiser Kitchen, and now that I have time (???) it’s fun to test out her recipes once in awhile. These bundt cakes were given to me because the first time they didn’t turn out too well, but the addition of coconut oil and some RTTC magic, and presto, some delicious bundt cakes. Enjoy!

Mini Toasted Coconut Bundt Cakes: A TWK/RTTC Original

Ingredients

  • 1 cup coconut oil
  • 1 1/2 cups sugar
  • 3 eggs
  • 3 cups cake flour
  • 1 teaspoon baking powder
  • 1 tablespoon vanilla paste
  • 1 1/2 cups coconut milk
  • 2 cups toasted coconut

Directions

  1. In the bowl of a stand mixer fitted with a paddle attachment, add the coconut oil and the sugar until light and fluffy, about 3 minutes. Add the eggs one at a time, making sure each is fully incorporated before the next addition. Add the vanilla paste (or vanilla extract).
  2. In a separate bowl, sift together the flour and baking powder.
  3. Alternate adding the coconut milk and the flour mixture until just combined. Add the toasted coconut and fold in until just combined.
  4. Bake for 14-16 minutes, or until a toothpick comes out clean.

We can put off the whole “get fit for summer trend” until next week, right? 🙂

-Rayna

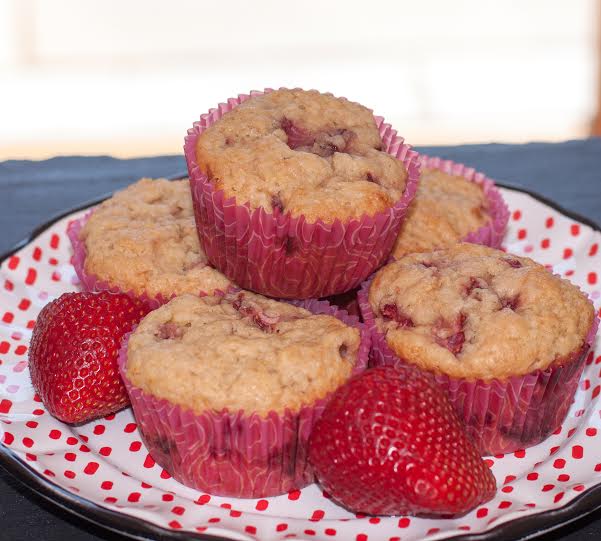
Meyer Lemon Strawberry Muffins

Good morning! I hope that spring has treated everyone nicely so far. This past month has been very hectic, and it’s only bound to get busier now that concert season is starting up. Within the next 3 weeks, I have my senior recital, my final orchestra recital, my chamber recital (with my group at MSM), my final orchestra recital (at my high school), and plenty more that I’m sure I’m forgetting to mention here. I love the spring, but it doesn’t leave me much time to actually get outside and enjoy the beautiful weather.

This weekend was especially wonderful to me because it was my last gymnastics meet in the USAG program. At states at the end of March, I qualified to my 3rd consecutive regional team for CT and had the opportunity to compete in Boston this weekend. It was such a fun meet, and I still can’t believe that after all of the hours of work I’ve put in, that this weekend was the end of my competitive career. It was by no means an easy road, but I wouldn’t have traded my experience for the world. I love gymnastics, no matter how much beam and I don’t get along. 🙂

Even though I was in the heart of training for regionals and preparing for the endless recitals coming up, I wanted to make sure that you guys weren’t left in the dark, and made these lovely springtime muffins to share with you. I love meyer lemons, but since they aren’t available very often I try to make the best of it when they’re there. These muffins are a lovely, light way to start off your day, with the slight tartness of the lemons and the crunchy turbinado sugar on top adding wonderful texture to the otherwise soft muffins.

-1Meyer Lemon Strawberry Muffins: From My Baking Addiction

Ingredients

  • 2 1/2 cups (325 grams) all-purpose flour
  • 3/4 cup (150 grams) granulated sugar
  • 2 teaspoons baking powder
  • 1/4 teaspoon baking soda
  • Zest and juice of one Meyer Lemon
  • 1 large egg, lightly beaten
  • 3/4 cup (180 ml) buttermilk
  • 2/3 cup (160 ml) safflower or canola oil
  • 1 teaspoon pure vanilla extract
  • 2 cups chopped, fresh strawberries
  • Turbinado sugar

Directions

  1. Preheat oven to 375 degrees F (190 degrees C). Position rack in center of oven. Butter or spray with a non stick cooking spray 12 – 2 3/4 x 1 1/2 inch muffin cups. Set aside.
  2. In a large measuring cup or bowl whisk together the egg, buttermilk, oil, Meyer Lemon juice and vanilla extract.
  3. In another large bowl combine the flour, sugar, baking powder, baking soda, salt, and lemon zest. Gently fold in the berries. With a rubber spatula fold the wet ingredients into the dry ingredients and stir only until the ingredients are combined. Do not over mix the batter or tough muffins will result.
  4. Fill each muffin cup almost full of batter, using two spoons or an ice cream scoop and sprinkle with turbinado sugar. Place in the oven and bake until a toothpick inserted in the center of a muffin comes out clean, about 20 minutes. Transfer to a wire rack and let cool for about 5 minutes before removing from pan.

Enjoy!

-Rayna


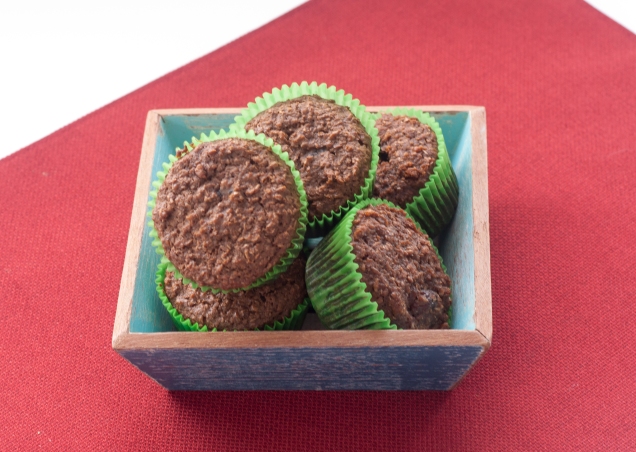
Sour Cream Bran Muffins

These past few weeks have been action packed, stressed beyond belief, seemingly endless waiting, but that time is over! I am so happy to say that this coming fall, I will be a Northwestern University Wildcat as a part of the class of 2018, majoring in Viola Performance. It’s such a relief knowing that all of my hard work has paid off these past few years, and after visiting and auditioning in January, I couldn’t imagine myself going anywhere else. And don’t worry, I’m already stocking up on purple and white merchandise!

-3One of the questions that I get the most after I mention that I run a baking blog is what do you do with all of the things you make? Well, while I do taste everything I make, it’s rare that I make something just because I want it. While I love a good muffin, these were not made for me- they were made with my aunt in mind. She’s a sucker for coconut, but recently asked me to make something healthier, and that’s where these muffins came in.

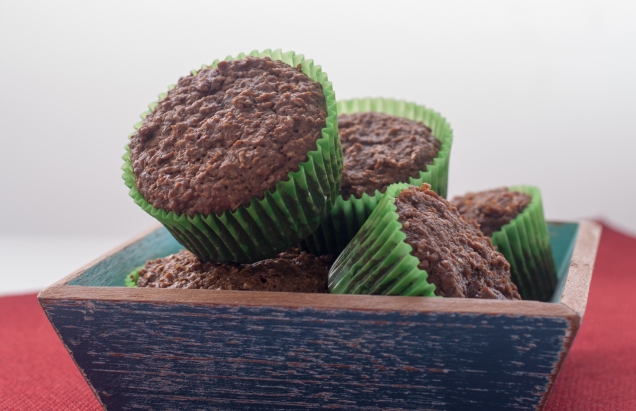
-5Breakfast is hands down my favorite meal of the day, and if I am going to have a muffin, it better be one that can sustain me from 6:45 am until lunch, which can be upwards of 5 hours. These muffins are not the cakey kind, and filled with wheat bran and raisins, they’ll keep you going for awhile. I loved it toasted with a shmear of peanut butter, but I’m sure they’re good straight out of the oven. 🙂

Sour Cream Bran Muffins: From Smitten Kitchen

  • 1 stick (1/2 cup) unsalted butter, softened or 1/2 cup vegetable oil
  • 1/4 cup firmly packed light brown sugar
  • 1 large egg, beaten lightly
  • 1 cup sour cream or yogurt
  • 1/4 cup dark molasses
  • 1/2 cup raisins, cranberries, or other diced dried fruit
  • 1 cup all-purpose flour
  • 1 teaspoon baking soda
  • 1/4 teaspoon salt
  • 1 cup miller’s bran (available at natural foods stores, specialty foods shops, and some supermarkets)
  • 1/4 teaspoon cinnamon (optional)

Directions

  1. In a large bowl with an electric mixer cream together the butter or oil and the brown sugar until the mixture is light and fluffy (will be far less light or fluffy if oil is used), beat in the egg, the sour cream or yogurt, and the molasses, and stir in the raisins or other dried fruit.
  2. In a bowl whisk together the flour, the baking soda, the salt, the cinnamon (optional) and the bran, add the mixture to the sour cream mixture, and stir the batter until it is just combined. (The batter will be lumpy.)
  3. Spoon the batter into 12 well-buttered 1/3-cup muffin tins and bake the muffins in the middle of a preheated 400°F. oven for 15 to 20 minutes, or until they are golden brown and springy to the touch. Turn the muffins out onto a rack and let them cool.

Enjoy!

Rayna 🙂

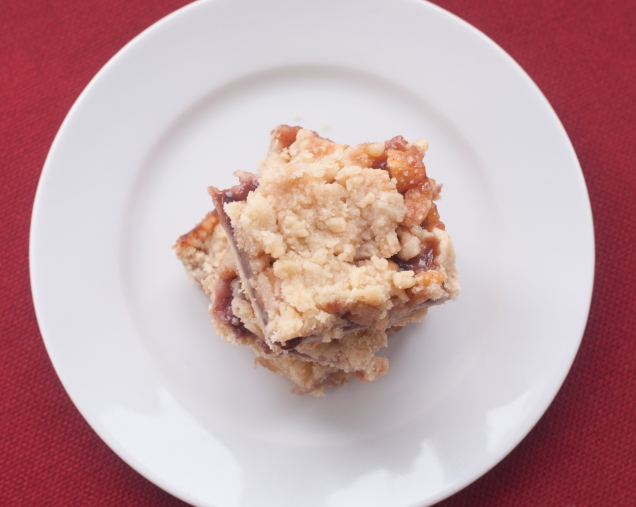
Apple Blackberry Crumble Bars

Good afternoon everyone!! I hope that your St. Patrick’s Day was filled with lots of green, clovers, and hopefully not too many green treats, because to be honest, those kind of scare me. Mine was pretty uneventful, but this coming weekend is going to be filled with lots of news. In the next few weeks, I’m going to be receiving all of my college notifications, which is a little bit stressful to say the least. But, the only thing that I can do at this point is wait, and to help you wait too, I made you something that isn’t green!

-4My last ever state gymnastics meet is this coming weekend. I’m still having a hard time thinking about that, but I knew that this day would come eventually. I’ve been at my gym for 7 years, and it’s sad to think that this is the last time that I’ll be able to wear my leotard and warmups. It’s going to be hard to say goodbye to a sport that I’ve spent so much of my life participating in, but I’m hoping that wherever I go I will be able to compete on a club team or even train at a gym recreationally.

-1I always seem to end up with tons of apples at my house. I love to eat them as a healthy after school or gymnastics snack, but there are some weeks where there seems to be an endless supply of apples in our kitchen. I’ve made so many apple desserts that are just so similar, and I wanted something a little different. These crumb bars are a mixture of a buttery shortbread crust, cinnamony apples, and a slightly tart layer of all natural blackberry preserves. While you can use whatever you would like, I love the mixture between these 2 and would highly recommend it.

Apple Blackberry Crumble Bars- From Annie’s Eats

Ingredients

For the base:

  • 1 1/3 cups all-purpose flour
  • 2 tbsp. sugar
  • 1 tsp. salt
  • 1 stick unsalted butter, at room temperature

For the filling:

  • 4 medium-sized apples, peeled, cored and coarsely diced
  • 5 tbsp. sugar
  • ¼ tsp. cinnamon
  • 2 tsp. cornstarch
  • 2 tbsp. lemon juice
  • ¼ cup fruit jam (I used peach)

For the topping:

  • ½ cup all-purpose flour
3 tbsp. sugar
  • 4 tbsp. unsalted butter, softened

Directions:

  1. To prepare the filling, in a large skillet combine the apples, sugar, and cinnamon.  Cook over medium heat, stirring occasionally, for 5-7 minutes, until apples are tender but still firm.  In a small cup, whisk together cornstarch and lemon juice.  Add to the apple mixture and continue cooking, stirring constantly for 3 minutes or until thickened.  Remove from heat and set aside to cool.
  2. Preheat oven to 350°.  Line an 8×8” baking dish with foil, leaving overhang on both sides for easy removal later.  Grease foil.
  3. To make the base, in a medium bowl combine flour, sugar and salt.  Mix well.  Cut the butter into the flour mixture using a pastry blender, two forks or your hands, until it resembles breadcrumbs.  Press the mixture into the bottom of the prepared pan.  Bake for 10-12 minutes, until lightly browned around the edges.  Remove from the oven.  Spread the fruit jam evenly on the base while it is still hot.  Top with the cooked apple mixture.
  4. In a medium bowl combine all ingredients for the topping.  Mix well until combined and crumbly.  Sprinkle over the apple layer.  Bake for 25-30 minutes or until golden brown.  Remove from the oven and allow to cool.  Using the foil, lift out of pan.  Cut into squares and serve.  (If desired, refrigerate before cutting to firm up a bit for easier slicing.)

Enjoy!

-Rayna 🙂